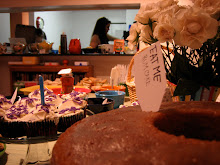
So the next thing I shall talk about is my rum cake! Rum Rum Rum! Yum Yum Yum!
This is one of the most delicious and easiest cakes, ever to make. I sort of cheat because I use a boxed mix, but it's only because it is more moist than anything I could make on my own (as of right now. I'm experimenting with yellow cake this weekend. More on that, later.)
Ingredients and Tools:
Ingredients for the Cake:
1 box of yellow cake mix (I usually use Duncan Hines)
1 4-serving size box of instant vanilla pudding mix
4 eggs
1/2 cup cold milk (you can also use water if you're tryin' to keep the lactoses away)
1/2 cup vegetable oil
1/2 cup dark rum (I use Meyers)
Tools:
Oven
Mixing bowl
Spatula
Hand/stand mixer
Measuring cups
Bundt cake pan
Glaze Ingredients:
1/2 cup butter
1/4 cup water
1 cup sugar
1/2 cup dark rum (more Meyers, please!)
Tools for the Glaze:
Stove
Saucepan
Spoon
Measuring cups
Bamboo Skewer
Pastry brush
Directions:
For the Cake:
1. Preheat the oven to 325 degrees F.
2. Grease the Bundt pan and then flour it. (When I flour cake pans when I make a boxed cake, I use a bit of cake mix instead of flour. It won't turn your cake white, and it will taste like the cake itself! Ta-Da!)
3. Mix all of the cake ingredients together and beat for about 2 minutes with your electric mixer. (Told you it was easy).
4. Bake in the oven for 1 hour.
5. After the cake comes out of the oven, poke holes ALL over the place while the cake is still in the pan (while it's still warm). Get the skewer all the way into the bottom, you want the glaze to saturate that cake! (Sometimes, if I'm feeling generous, I make a double batch of the glaze).
For the Glaze:
Right after the cake comes out of the oven and is hokey-poked with holes, start the glaze!
1. Melt the butter in a saucepan
2. Stir in the water and the sugar. Boil for 5 minutes, stirring constantly.
3. Remove from heat and stir in the rum It will steam and possibly scare you, just keep stirring, you'll be fine!
4. Slowly pour the warm glaze over the cake (while it is still in the pan). It's okay if some sits on the top for a bit...let it soak in.
5. After is has been soaking for about 30 minutes or so, invert the pan onto your serving plate.
6. Use the pastry brush to get any leftover glaze onto the top of the cake.
Smile! It's done...and is tasty even after a few days of sitting out. It's good in the toaster oven 3 days later. It freezes beautifully. It is amazing!
Notes: You can do it with other flavors of cake/pudding mix. Some people add 1 cup of nuts to the mix (I don't 'cause so many people are allergic these days). It is delicious! Enjoy!!
Wednesday, March 24, 2010
Monday, March 22, 2010
Choose Your Own Adventure Taco Soup
Yay! It's March! (Okay, almost April, but I've always been a bit of a procrastinator). It's still a bit too cold for a barbeque, but I'm already tired of the heavy, wintery meals. Time for tacos!
Well, taco soup, anyway.
A note on Mexican food: I have realized why I didn't really like Mexico (ok, it's real name is La Parota) when I was in Farmville. I always knew Mexican food had to be better than that. I have learned, over the past two months that it is! Because there is El Salvadoran food to be had! We've been to two El Salvadoran restaurants since January. Samantha's (on my birthday, no less) and this little place near 16th and U Street in DC. AMAZINGLY good food! I had duck on my birthday with an amazing, not-too-sweet, just enough sour margarita, and it was some of the best food I'd ever had. Then when we went to the place in DC, I had Monterey Enchiladas. Enchiladas just filled with melting, soft, salty cheese. And a drop-dead-gorgeous Raspberry Margarita. GAH! Where has it been all of my life?
Ok, the recipe. It is delicious! And easy! And cheap!
Choose Your Own Adventure Taco Soup
Ingredients and tools:
1 pound of ground beef or turkey, whichever's cheapest/you prefer.
1 small sweet onion, chopped
Here's where the choices come in:
3 cans of beans. Regular sized, NOT the GIANT HUGE FAMILY SIZE (Pinto, Navy, Black, Kidney, Blackeyed any combination of three of those. Green beans probably won't work so well, and I don't think they're very taco-y)
3 cans of chopped tomatoes (With our without chiles/jalapenos/onions. Depends on how spicy you want it)
1 can of corn (not creamed corn, regular corn.)
1 packet of McCormick's taco seasoning (Mild/Regular/Medium/Hot, whatever you like)
Easy stuff, right? It gets even easier.
Tools:
Do you have a crock pot? Yes! Good!
No? Do you have a soup pot? Yes! Good!
No? Go buy one, here's $10. Or you can have one of mine.
Knife for chopping the onion.
Spatula for getting the beanybits out of the cans
Wooden spoon for stirring.
Cookie sheet to protect counter from over-zelaous crock pottage
Can opener
Crock pot method:
1. Brown the onions and the ground meat in a skillet until the meat is done and the onions start to turn clear.
2. In the mean time, open all of your cans of various beans/tomatoes/corn
3. Put the crock pot on a cookie sheet in case it gets a little full, that way your counter won't be a mess.
4. After the meat/onions are ready, put them into the crock pot. Add the cans of vegetables, stirring after each addition.
5. Fill one of the cans with water and then pour it into the other cans so all the extra bits get rinsed, then add it to the crock pot. (You can use leftover red wine as well, whatever makes you happy)
6.Add the taco seasoning and stir.
7. Turn the crock pot on low. Continue on about your day. If you're home, give it a stir every once in a while.
If you're using a soup pot:
1. Brown the meat and onions in the soup pot until the meat is ready and the onions start to turn clear.
2. In the mean time, open all of your cans of various beans/tomatoes/corn
3. Add the cans of vegetables, stirring after each addition.
4. Fill one of the cans with water and then pour it into the other cans so all the extra bits get rinsed, then add it to the crock pot. (You can use leftover red wine as well, whatever makes you happy)
5.Add the taco seasoning and stir.
6. Simmer on low for as long as you feel like letting it cook. (Not overnight or anything)
I usually make cornbread to go with it. I also like to add sour cream and cheddar cheese. It's kind of a mix between a chili and a soup, but it is really good, keeps in the freezer, and makes good leftovers. (I think it is even better the second day)
Sunday, March 21, 2010
One of my Favorite things...
...is something my mom made as a kid and called it "Frosty Treasures" it is also called "snowman poop" and "puppy chow." Ringing a bell?
I made some Friday night around 10 pm because I was craving it on the way home from eating on of my top 10 favorite burgers, ever, from Urban Burger Company in Rockville. I had been craving a cheeseburger for a full 24 hours, after reading an article about cooking them on Serious Eats, mainly their "A Hamburger Today" portion. A quick search of The Washington Posts' "going out guide" led us to Urban Burger. It was delicious. If you live in Maryland, especially those of you near College Park, it's worth it. It was $19 and change for 2 delicious, made-to-order burgers, an order of fries (you only need 1 order for 2 people, trust me!) and 2 sodas (they had Old Dominion Root Beer on Draught-amazing).
Anyways, back to the real story here-Frosty Treasures.
My mom would make them when the cereal in the pantry was starting to get a bit stale. She'd throw other stuff in there too, like stale marshmallows (my mom, sisters, and I all seem to like our marshmallows stale...mom will buy Peeps on sale, stab a hole in the cellophane, and give them to us the next Easter. delicious.), pretzels, m'n'ms. Whatever was lying around.
Ingredients and Tools:
1 cup creamy peanut butter (in case you haven't tried it yet, Giant's brand is GROSS. Wegman's is amazing)
1 12oz bag of chocolate chips (most recipes call for semi-sweet. I used Hershey's milk chocolate because I was going for the "Reeses" taste)
5 tablespoons of butter (most recipes call for a whole stick, but it doesn't need that much. You can probably use less. Or use cooking oil, whatever you prefer)
1 box of Crispix cereal [(Any of the Chex works as well-Rice, Wheat, Corn.)(If you have any other snacky foods that are going stale, or you're just sick of eating plain, put some of those in there, too. (Speaking from experience, Cheddar Goldfish are GROSS in there))]
2 cups of powdered sugar
Tools:
A microwave
A microwave safe bowl large enough to hold the chocolate, peanut butter, and butter. (A 4 cup pyrex is perfect)
Wooden/mixing spoon
Either a large ziploc bag (gallon sized or bigger) or a large plastic bowl with a lid.
Here's what you do:
1. Melt the peanut butter, butter and chocolate in the microwave. I do it in 1 minute increments, stirring as it gets melty. You want it to be pretty liquidy, but not to the point of separation. You could use a double boiler if you want, but it will take awhile.
2. While the stuff is in the microwave, pour the cereal into the large bag/bowl.
3. After the PB/chocolate/butter mixture is melted, pour it over the cereal. Seal the bag/bowl and shake vigorously until the cereal is well-coated.
4. Pour the powdered sugar in, and shake it up again until the cereal is whiteish with sugar. You might need to add a bit more if the cereal mix won't coat.
5. Now you can eat it. It might look a little iffy, but it is so good!
Enjoy!
It makes good gifts at Holiday time! Pour some in a bag, stick it in a festive mug, and voila!
Wednesday, March 17, 2010
Guinness Cupycakes Part 2 (Well, it's turned into a cake..)
So those Guinness cupcakes that I made last night- I ended up making 12 cupcakes and then a nine inch cake. For 2 reasons...well maybe 3.
1) I only had 12 cute green and blue plaid wrappers
2) We'd eat all of the cupcakes (which we did, there are only 3 left)
3) I couldn't find my other muffin tins. And I was lazy- didn't feel like filling more liners and waiting for them to bake.
Ok, the recipe. I adapted SmittenKitchen's "Chocolate Whiskey and Beer Cupcakes" recipe.
Cupcake Tools:
2 Mixing Bowls
Measuring Cups and spoons
Mixer
Whisk
Small saucepan
Rubber Spatula
Muffin Tin or cake pan
Regular Sized Muffin Tins and Cuppycake liners (we had cute green'n'blue plaid ones)
Cupcake Ingredients:
1 cup stout-I used Guinness. (open the can, pour and let it sit for a minutes before you get the final measurement, because as any good Buffy fan knows: "Beer: foamy")
1 cup (2 sticks) unsalted butter
3/4 cup unsweetened cocoa powder (I used the rest of the Nestle Toll House from the cupboard)
2 cups all purpose flour
2 cups sugar
1 1/2 teaspoons baking soda
3/4 teaspoon salt
2 large eggs
2/3 cup sour cream (I actually used about 3/4 of a cup...I was feeling particularly liberal)
Frosting Tools:
Mixer
Mixing Bowl
Rubber Spatula
Measuring Cups and spoons
Pastry bag (you can get on from Target for less than $10. OR Cut off the bottom tip of a Ziploc Bag)
Frosting Ingredients:
3 cups confections sugar
1 stick (1/2 cup or 4 ounces) unsalted butter, at room temperature
3 to 4 tablespoons Baileys (I used Caramel Bailey's 'cause that's what we had. And I probably used about 4 and a half tablespoons)
Cupcake/Cake Directions:
1.Preheat oven to 350°F. Line 24 cupcake cups with liners. (Or spray some Pam on 2 8 or 9 inch cake pans. This time I made 12 cupcakes and 1 cake)
2.Bring 1 cup stout and 1 cup butter to simmer in heavy large saucepan over medium heat. Add cocoa powder and whisk until mixture is smooth. Cool slightly. (It got a little seperate-y for me. I just ignored it and hope it would turn out- it did)
3. Whisk flour, sugar, baking soda, and 3/4 teaspoon salt in large bowl to blend.
4. Using electric mixer, beat eggs and sour cream in another large bowl to blend.
5. Add stout-chocolate mixture to egg mixture and beat just to combine.
6. Add flour mixture and beat briefly on slow speed. Using rubber spatula, fold batter until completely combined.
7. Divide batter among cupcake liners, filling them 2/3 to 3/4 of the way. Bake cake until tester inserted into center comes out clean, rotating them once front to back if your oven bakes unevenly, about 17 minutes. Cool cupcakes on a rack completely.(That is, if you don't eat them all first)
Frosting Directions:
1. Whip the butter in the bowl of an electric mixer, or with a hand mixer, for several minutes. You want to get it very light and fluffy.
2. Slowly add the powdered sugar, a few tablespoons at a time.
3. When the frosting looks thick enough to spread, drizzle in the Baileys (or milk) and whip it until combined. If this has made the frosting too thin (it shouldn’t, but just in case) beat in another spoonful or two of powdered sugar.
4. Ice and decorate the cupcakes. Make sure the cupcakes are totally cooled. It usually takes a few hours. I didn't frost mine 'til the day we served it. (St. Patrick's Day!!) I used a star tip and kind of wavered it around to make it look foamy, like the head of Guinness.
The cake looks really cute- like a disk of yummy, yummy Guinness. The cupcakes that we inhaled...er tested just taste like a really rich chocolate. The Guinness adds and extra "umph" that you usually don't get from milk or cream. The frosting is rather sweet- I really like that I used Caramel Bailey's because it adds an extra creaminess that you don't usually get from regular Bailey's.
We're having corned beef, cabbage, carrots, and fingerling potatoes for dinner. Dave made Irish Soda Bread. There's Guinness, Smithicks, and an Irish Cream Ale in the fridge. The Irish Rovers are on the stereo. Friends will be on their way over shortly. It's going to be a good evening!
Tuesday, March 16, 2010
Guinness Cupycakes Part 1
Hello! So...for starting a baking blog, I haven't been doing a lot of baking/cooking lately. BUT while watching Star Trek with Dave tonight, I got the craving for cupcakes. I knew SmittenKitchen had posted a recipe for them a few years ago, so I hopped on over and looked at the ingredients list. Lo and behold, we had everything in the pantry and fridge! So, I commenced baking. They are in the oven now and smell amazing! The batter was pretty tasty, too. Dave totally licked off one of the beater bars from my mixer.
I'll put the recipe up with my maniacal additions/subtractions/substitutions when they're out of the oven.
In other news, Dave and I took a day trip to Harper's Ferry today. I had never been before- it was absolutely gorgeous! Such pretty views... and I forgot my camera...guess we'll just have to go back soon!
We stopped for Indian food (Dave's unfavorite food) from a restaurant about 2 minutes from el apartmento. I had Chicken Tikka Masala- waaaay more spicy than I am used to, but the Samosas were DIVINE! And the na'an was really good, too.
Monday, March 15, 2010
What I'm working with
Lots of other cooking blogs that I read religiously use some fancy-schmancy stuff. I'm a graduate student, so by my very nature, I'm not exactly swimming in dough.
The fanciest thing we probably have is the toaster...or maybe Dave's 5.5 quart skillet. Most of the stuff we have is hand-me-down from the random people who knew I was moving into an apartment.
Pots'n'Pans:
3 large saucepans for boiling water for things like spaghetti or making soup. 2 non-stick and one aluminum (we should probably get rid of one of them...)
1 5.5 quart skillet with lid
1 square flat frying fan (perfect for grilled cheese, french toast or anything non-liquid-y)
1 large frying pan- used for crepes, scrambled eggs, tasty breakfast meats
3 small frying pans- good for frying eggs, smaller portions of things
Random assortment of various sized quart saucepans, varying stick/non-stick
Aluminum bowl that I use as a double boiler for puddings and melting chocolate
1 panini press
Mixin' it up stuff:
3 matching mixing bowls from Target. I don't like them very much because they narrow in at the bottom
1 GIANT red mixing bowl from Wal*Mart (I bought it in college) I use this the most
1 Ancient hand-mixer. It was my mother's when she first got married in 1979 (it might be even older than that). I use it for all of my cakes and cookies. It only has three settings and works perfectly!
Seventy-billion wooden mixing spoons in various sizes.
1 Bamboo mixing spoon that always seems to be dirty
1 Balloon whisk- nicely weighted and all-around perfect
1 Rainbow flat whisk (it's coated so we can use it in Dave's fancy pan)
1 Pastry Cutter- used for incorporating butter into things, like scones
1 Rolling pin- non-stick (I'm really bad at rolling things out)
Cooking Utensils:
4 pancake flippers/spatulas- One OXO one that we all love, varying plastic/metal ones
Various plastic serving/stirring spoons
Slotted spoon for fishing things out of liquid (ie Poached Eggs)
Spaghetti Spoon
Rubber Spatulas- they're everywhere- in the drawer, in the crock next to the stove, in the dishwasher.
A chopstick or two in the crock helps give sauces a quick stir'n'taste
Measuring Up:
I have a problem with pyrex...I have about 6 measuring cups in various sizes from 2 cup to 2 quart.
Ikea measuring cups and spoons. I don't really like them because they get all scratchy and cloudy and I accidentally sent the 1/8teaspoon through the garbage disposal.
Hard plastic Kitchen Aid measuring cups- I seem to have lost a few of them over the years
1 metal 1-cup measuring cup. My favorite. Will wash it if it's dirty in the dishwasher so I can use it again.
We just got a measuring cup sifter from the Kitchen Store. I'm very excited!
K-nives
Dave has some nice Henkels knives
Beth has a knife block of some decent knives
I have random knives from my mom
Most of the knives we have between the three of us are pretty dull. We should sharpen them.
Other tools:
Garlic Press
Vegetable peeler (it's old and kinda dull and I always forget to pick up a new one)
Blender
George-Foreman knock-off
Zyliss vegetable chopper
Crock Pot
Electric Skillet
Butter Crock
Cheese Grater
Can opener
Frosting Spatulas (One large, one small)
Electric kettle for boiling water
Tiny microwave from college (works like a charm)
Toaster Oven
Espresso Pot
French Press
I keep flour, sugar, brown sugar, coffee, and rock sugar in canisters big-to-small on the counter.
We have an electric stove that's new, and a new fridge. So, that's all very nice and non-gross. Except when I burn things and the stovetop gets a little gunky.
As far a serving dishes are concerned, I collect Fiestaware . I have been collecting the dishes since I was 16 (I figured I'd start early) and the dishes have been around since the 1940s and will continue to be for years to come, I think. I have the place settings in Scarlet, Colbalt, Peacock, Tangerine, Sunflower, and Shamrock. I have a few serving pieces in Rose as well. I love the bright colors and the vintage look.
We use Ikea basic silverware- it is something like $10 for service for 8, but I'm collecting some nice Oneida stuff for when I "grow up." Our drinking glasses are leftover from my college apartment- a purchase from Wal*Mart. (Oh, Farmville). Dave also collects pint glasses, so they're in the cabinet as well.
I also collect teapots, so we have QUITE a few of those. And cups that may or may not match.
That's about it, really. We're really lucky that the kitchen in this apartment is actually bigger than any that I've been in since I left home. (My mother LOVES to cook and bake, so her kitchen was HUGE and had a Professional Viking Stove. I miss it.)
That's what I have. If you look around, you'll notice that you probably have the same stuff, too. Yay.
First Post! Omnomnom
Hi. My name is Alice. I'm a 24 year old Master's student at the University of Maryland's iSchool. iWhat, you ask? Library Science. That's right, I'm going to be a librarian. (Puffs up chest and looks proud). I already have the cardigans, the shoes, and the bun. I just don't have the glasses. Yet.
I'm also getting rather soft shaped...er...curvy. See, I have a problem. I like to bake. A lot. Too much, I think, as going to the gym two times a week clearly isn't melting the sticks of butter and cups of sugar away. But I'm working on it.
So, I don't know how else to start a food blog except for describing some of my most recent escapades. Like breakfast this morning. Well, early lunch. Egg McMuffins. Real Egg McMuffins. What McMuffins would be if McDonald's had the time to make you feel good about buying four basic ingredients that, apart taste delicious, and together taste absolutely heavenly.
Alice's Egg McMuffins for 2
Ingredients and Tools:
Something I'm still learning is: Get everything ready first. That way you aren't scrambling to the Fridge-toaster-stove while something's burning and everything else is still totally raw.
For the Poached Eggs:
2 Eggs
Splash o'Vinegar (White vinegar is best..and cheap- 89 cents at Shoppers)
Non-stick pot WITH cover (1-2 quart is fine, whatever you have, really but it HAS to have a cover)
Slotted Spoon
Few cups of water
2 small ramekins or 2 measuring cups
Cereal Bowl with cold water in it (Set near the stove)
Paper Towels
For the Meaty Bits:
2 slices of Canadian Bacon (Regular Ham lunch meat also works quite nicely, as does turkey)
Small Frying pan. I use a tiny one, the size of a piece of bread, non-stick. You can use what you have, it will be fine.
Pancake Spatula/Fork/Utensil for flipping meaty
For the Toasty Get-this-amazingness-to-my-mouth:
A toaster. Or an oven. Or a fire with a toasting basket. Whatever you use to make toast.
2 English Muffins (I use Thomas's Double Fiber Honey Wheat)
Bit o'Butter
2 Slices of American Cheese (I use white American because I think it melts better and honestly, it isn't day-glo orange which kind of freaks me out)
Here's what you do:
To Poach Eggs:
Don't let the movie Julie & Julia scare you. Poaching eggs is NOT HARD. At all. You just need a little patience and "the courage of your convictions" to realize that if you mess it up, it's only an egg, not an entire cake or country that's fallen.
1. Get a non-stick pot of water boiling. You want about an inch or an inch and a half of water in there. Enough so the eggs will be covered in a nice water bath. DO NOT ADD ANYTHING to the water. No salt. No vinegar (yet). While you're waiting for the water to boil, crack the eggs into your ramekins or the measuring cups. One egg in each bowl-shaped item.
2. The water probably isn't ready yet, huh? Split your English Muffins and stick them in the toaster. I have them on setting 4 or 5. You want them to be nice and crispytoastycrunchilydelicious.
3. Water ready yet? No? Heat up the small frying pan (I put it on medium-low) and stick your meat-y bits in there. The meat is already cooked, but you want it to be warm.
4a. Water boiling yet? Yes! Score! Ok, lower the pot to medium/lowlymediumish. You want a nice gentle simmer going on. After is simmers, pour a splash o'vinegar in there. For you people who like to measure things, about 1 and 1/2 tablespoons(ish). Give it a nice stir with the slotted spoon. The vinegar helps the white of the egg to coagulate. And it really doesn't affect the taste of the eggs, so it's all good.
4b. If the water isn't boiling, the English Muffins are probably done. Butter those guys up! Put a piece of cheese on side of them (Bottom or top, doesn't matter). Do you have a toaster oven? Yes? Put the Muffins in there on the pan that it came with that you probably never use and put the toaster on Broil. Set it to medium. Don't have a toaster oven? Use the regular oven on Broil (this could get complicated) or use the microwave. Just melt the cheese the easiest way possible for you.
4c. Check on the meaty-bits. You might need to flip them over. Do it.
5. (Here comes the poaching part!) Get your ramekins/measuring cups of eggs. Take a deep breath. You're about to poach an egg, and you're not going to be scared. Hold one of the ramekins over the water and gently pour the egg into the water, and use the spoon to keep the egg white near the yolk. They need to be friends and together. Do the same thing with the second egg. Put the cover on the pot. Turn OFF the heat, but leave the pot on the burner. Set your timer for 4 minutes and leave the pot alone. Resist the temptation to look at the eggs. Do something else, like get the Cheesy Muffins and Meat going. If the Cheesy Muffins and Meat are done, keep the meat on low so it doesn't burn or get cold, and leave the muffins where they are. Be patient, it's totally worth it. Maybe you could set the table, start a pot of coffee or tea, or pour some Orange Juice.
6. It's been 4 minutes! Take the lid off the pot. Smells kinda vinegary, huh? Ignore it. No big deal. Get your slotted spoon ready and fish one of those eggs out very carefully slide it into that bowl of cold water. Do the same with the other egg. Let them sit in there for about a minute so that they cool off. Get your Muffin/Cheese/Meaty Bits assembled on their plates. I prefer Muffin with Cheese on the bottom, then the Meat. Pick one of the eggs out of the water (I use my hands so I don't inadvertently stab the other one and let all its deliciousness out.) and place it gently on a paper towel and pat it to dry it off, then put it on one of the muffins. Do the same with the other one.
7. It's time to eat! You have to bite into it very carefully because the yolk likes to squirt out everywhere. Use the rest of the muffin to sop up the yolk. It's amazing, isn't it?
Congratulations, you've poached an egg! Don't you feel powerful?
Subscribe to:
Posts (Atom)